
The Custom Map Creation page allows you not only to purchase ready-made maps from the store, but also to select any location on Earth and design your own custom poster (and, if needed, a 3D model).
On this page, you choose the format, orientation, and map area, then lock the selection. After that, you proceed to the poster design stage, where you configure map content (layers) and visual parameters.
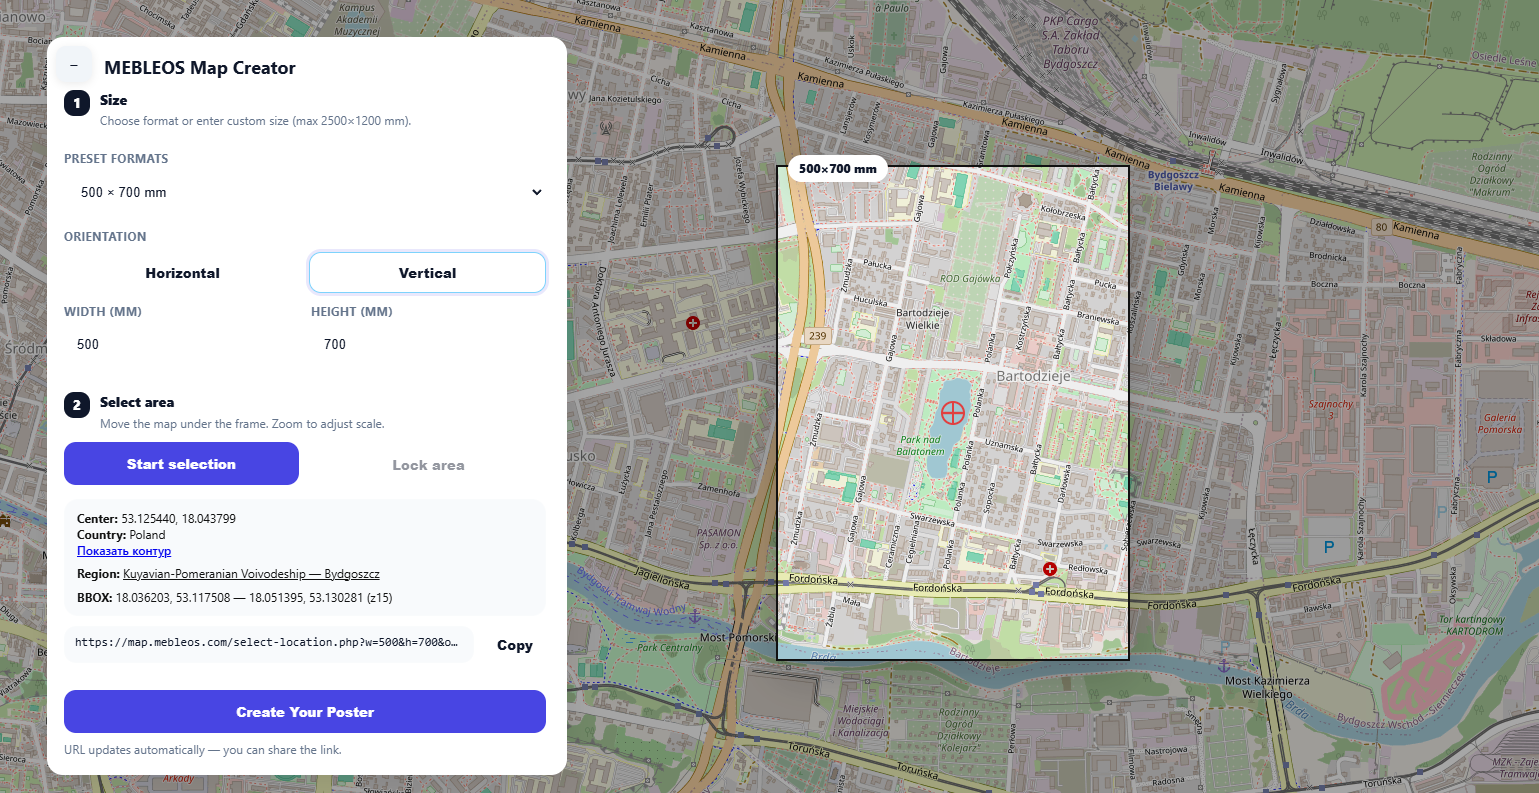
In the Size section, you can select one of the available formats or manually enter the dimensions in millimeters:
When you change the orientation, the frame on the map adjusts its shape, allowing you to immediately see the future composition.
Below is the Area selection block. It is used to precisely define the location that will be included in your project.
Below the selection block, the parameters of the selected area are displayed: center (coordinates), country, region, and BBOX (bounding box and current zoom level).
The Show outline option is also available — it helps visually identify the boundaries of the selected city or region.
After locking the area, a project link is generated containing all parameters (size, orientation, coordinates, zoom level, bounding box, etc.). This link can be copied and saved.
It allows you to return to the same project later or share it with another person.
After clicking Create your poster, the design page opens with a preview and order parameters. On the left, you see project information and the configuration form; on the right, a live preview of the result.
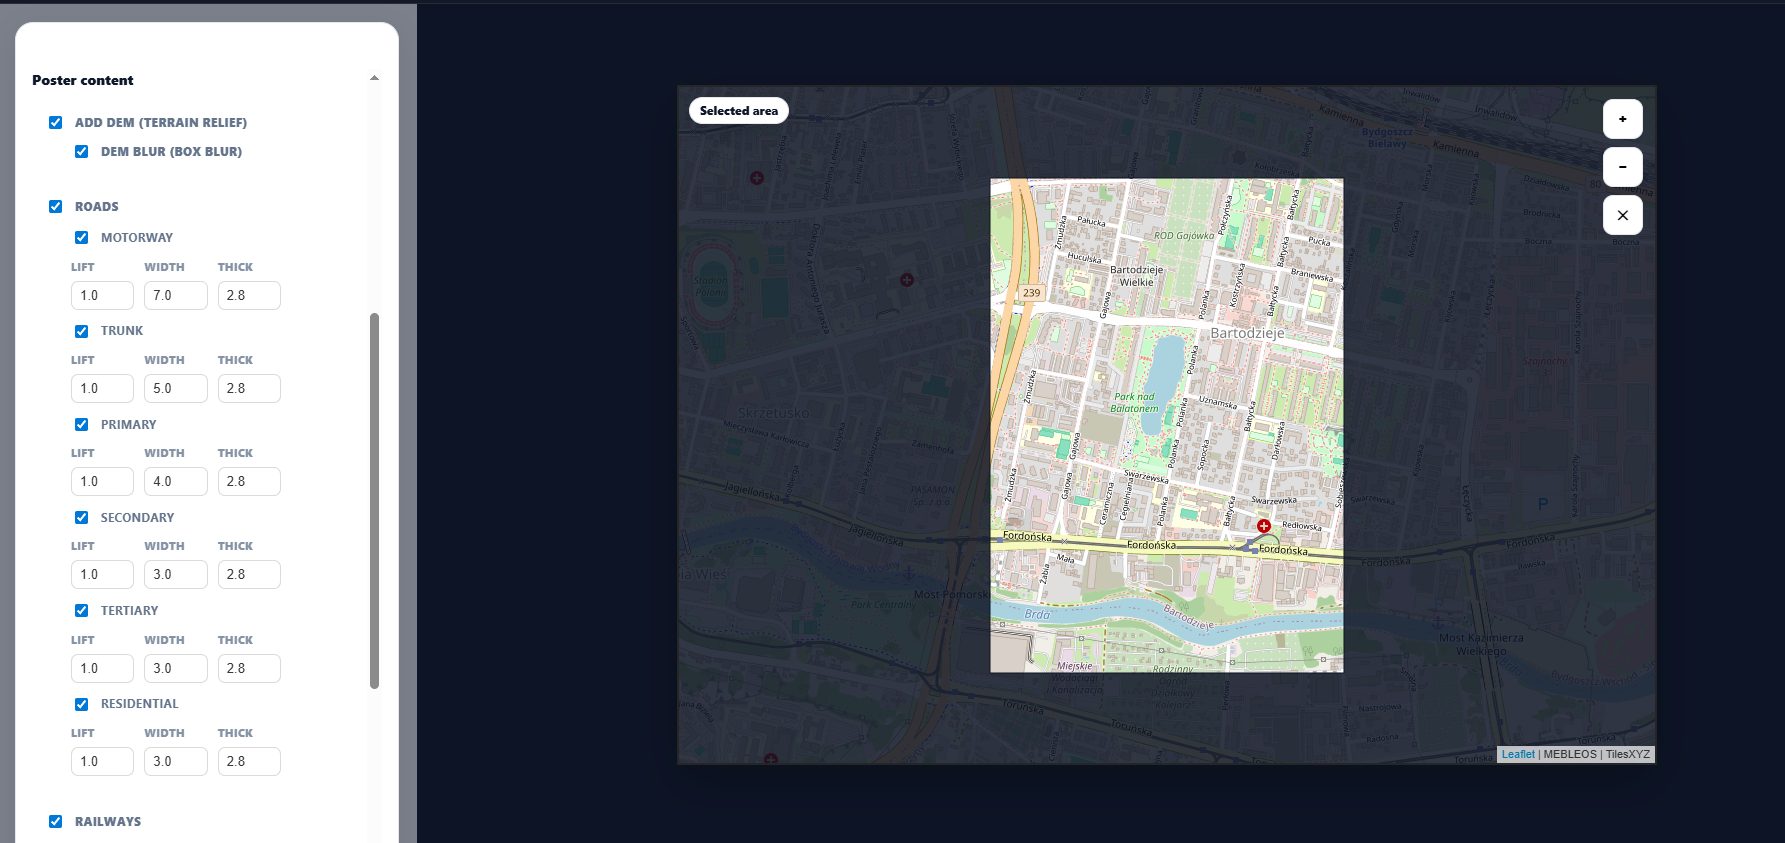
In the Poster content section, you choose which elements will be included in the final design. Available options may include:
Road categories can be enabled or disabled independently:
Each road category may provide parameters such as Elevation, Width, and Thickness.
Railways can be enabled as a separate layer and may also include Elevation, Width, and Thickness settings.
Water features are divided into categories that can be enabled individually:
The preview on the right shows how the final poster will look with the selected parameters and layers. The preview updates when settings change.
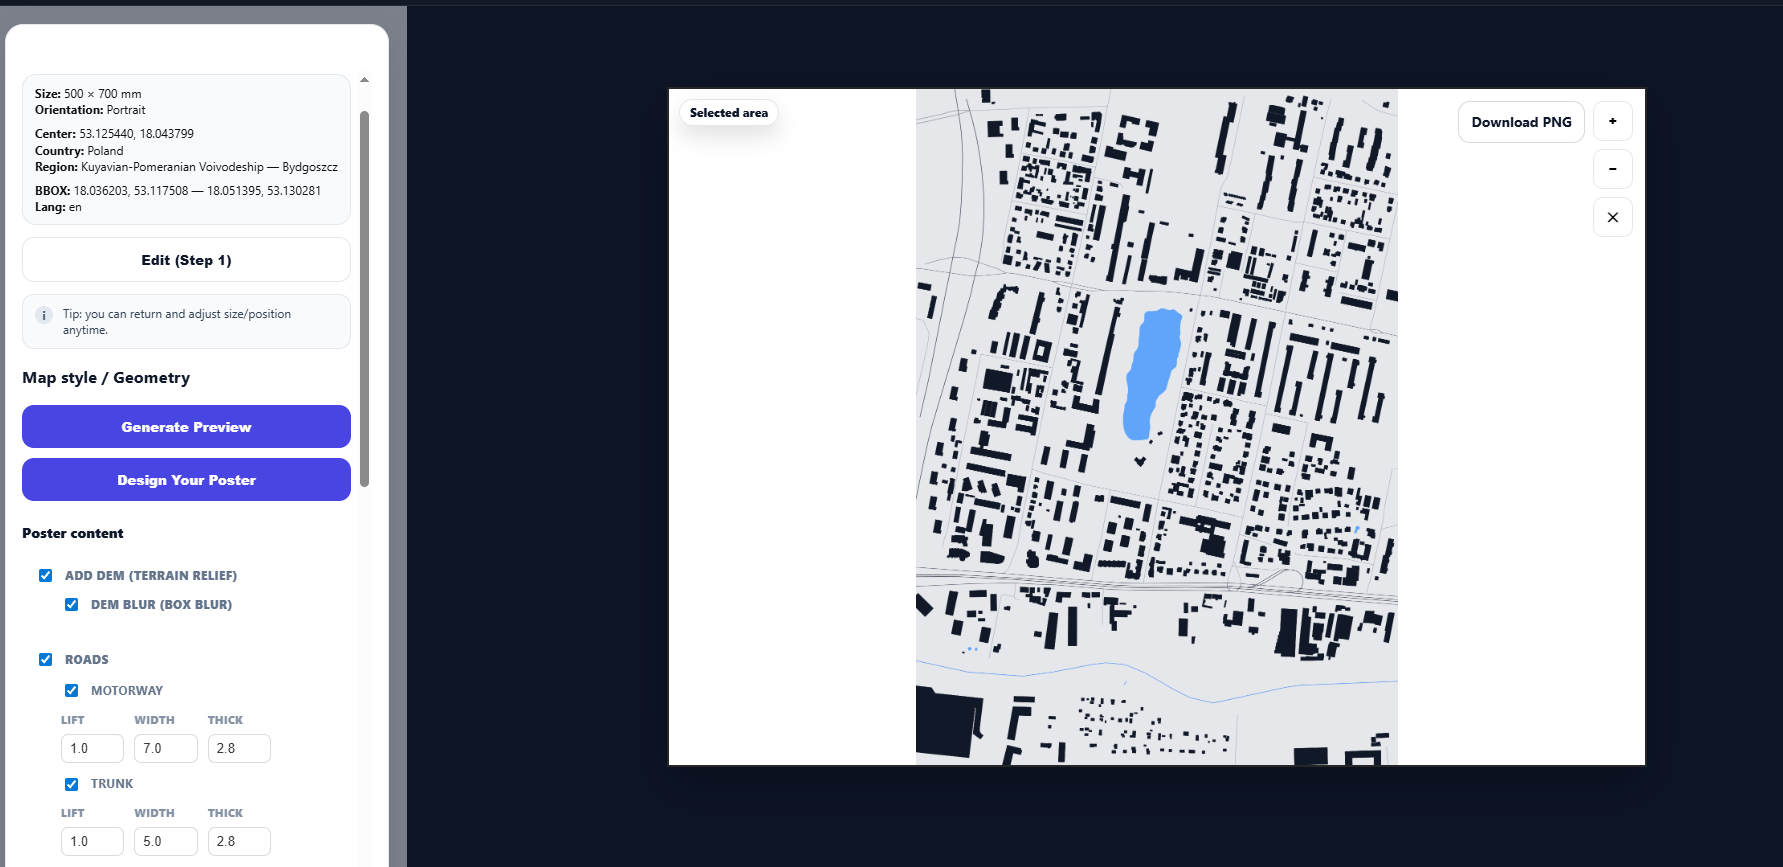
After proceeding to the design stage and submitting the request form, your project parameters are sent to us. We then contact you using the provided details.
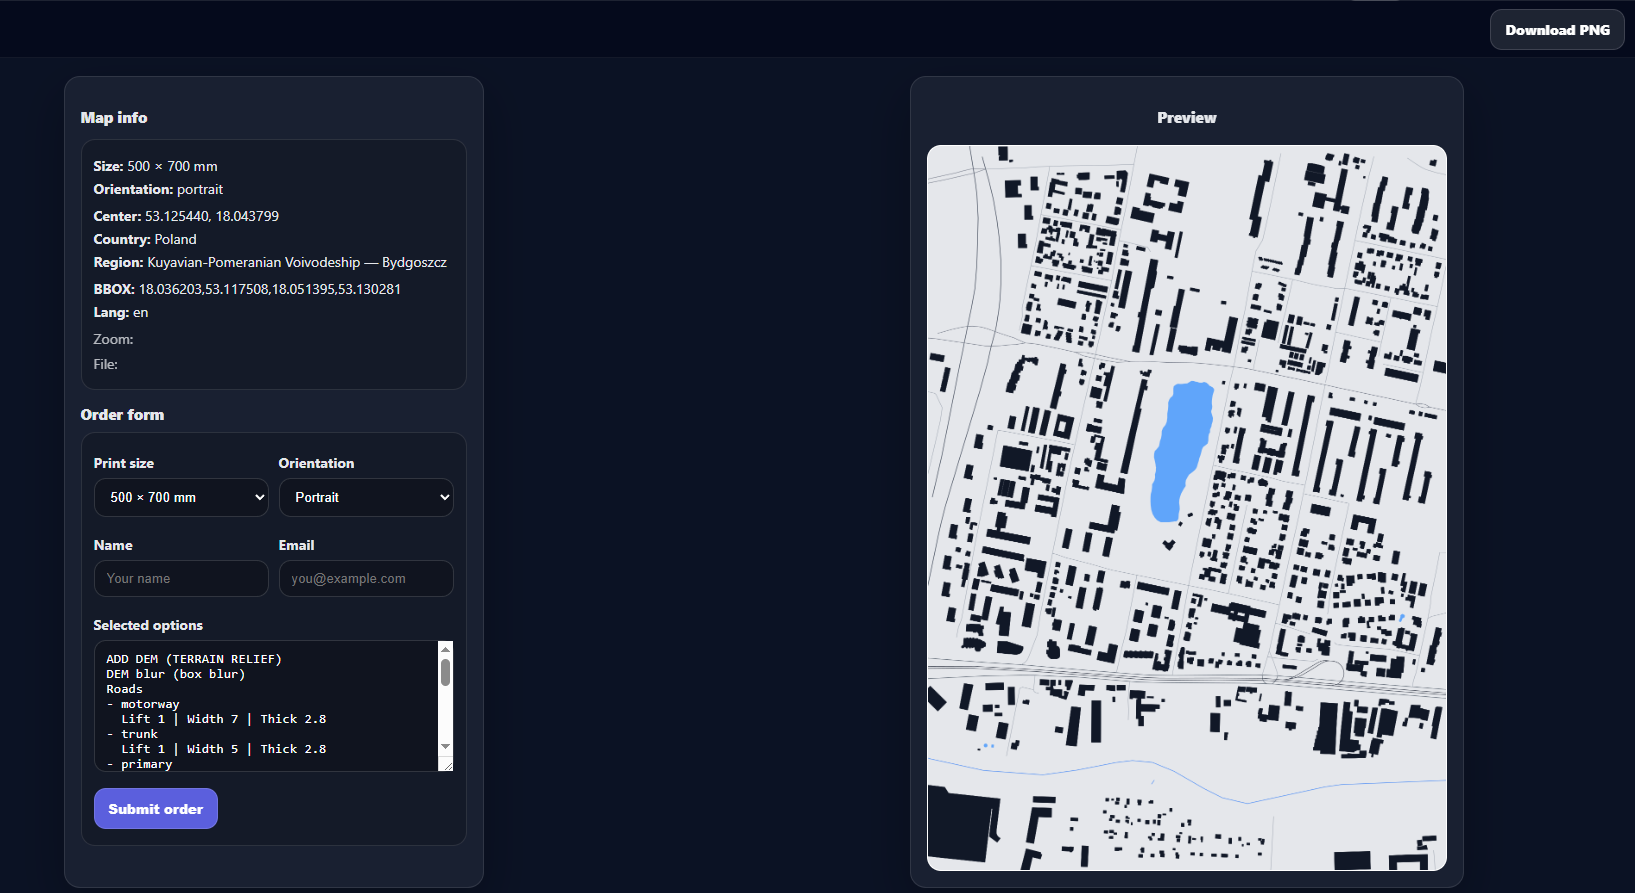
Before final preparation, it is possible to agree on project changes, such as layout adjustments, color corrections, adding labels, and other refinements. These details are discussed after placing a preorder.
After confirmation and payment, you receive a download link to the final files once they have been prepared, generated, and verified.